
FAQ
SimpLy Gallery uses Large size images to display in the lightbox and Medium size images to display thumbnails. The sizes of these images are customizable in the WP Dashboard -> Settings -> Media.
Changes to these settings will only affect new image.
But if there is an urgent need, then there is a method, but not very simple (at first glance).
1. Go to WP -> Settings-> Media Settings -> Large size -> Max Width=Max Height = 2000. And Save Changes
2. Install this plugin Regenerate Thumbnails and Activate – mini instruction
3. Go to WP Media Library and select several images (for test and training) that you need to show in a larger size. And in the drop-down menu (Bulk actions) select Regenerate Thumbnails and Apply
4. After the end of the regeneration process, go to the post / page with the gallery that contains these photos, select the block with the gallery and just Reload Gallery (click the button Reload so that the block will update large copies)
5. Then update the post / page and that’s it. The images in the gallery lightbox should get bigger
This way may seem difficult, but if you take your time, everything will become very clear and simple. And a little bonus – for all new photos, this does not need to be done.
Also, the Premium version of the plugin allows you to enable the image display mode in the original size. This mode is activated in the Lightbox settings -> Display Image in original Size. But if you upload large-sized images to your site, then you can significantly increase Internet traffic and increase the load on your server, while in many cases not having a significant increase in image quality.
An YouTube API Key is required to automate your galleries. Luckily the key is FREE. Kindly follow the steps below to create your own key.
STEP #1: LOGIN TO YOUR DEVELOPER CONSOLE
Click Google Developers Console and log in with your Gmail account.
STEP #2: CREATE PROJECT
Create a new project by clicking the “Create Project” button available at the top right side of the page. If you already have a project. Simply select it.
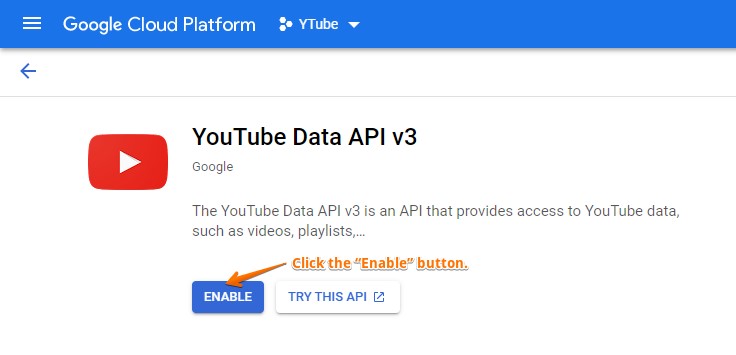
STEP #3: ENABLE API
Select the “Library” menu.

Type “YouTube” in the “Search for APIs & Services” search box, select “YouTube Data API v3” from the results shown.

Click the “Enable” button.
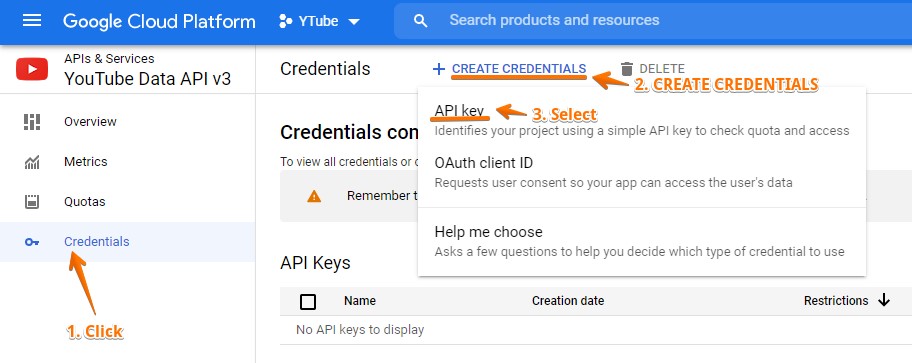
STEP #4: CREATE CREDENTIALS
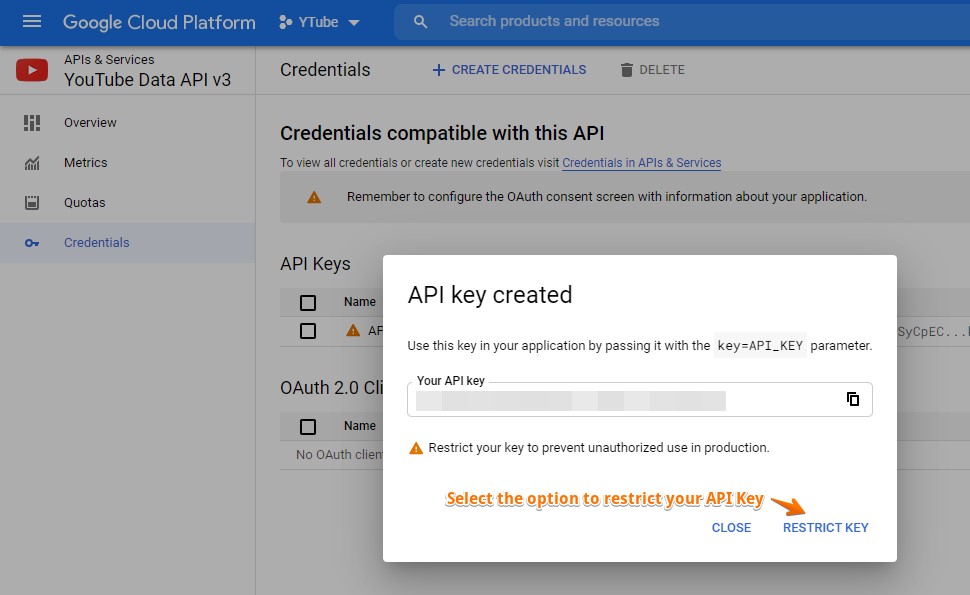
Select the option to restrict your API Key.
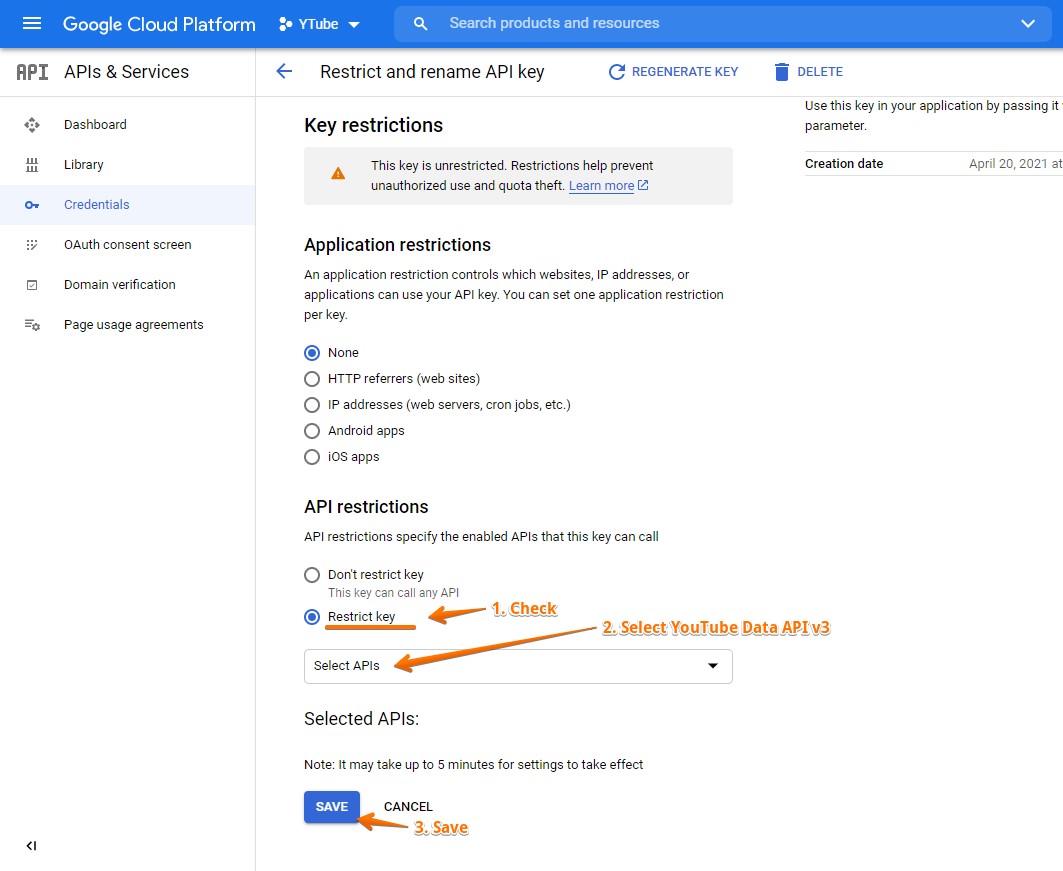
Configure API restrictions and click “Save”.
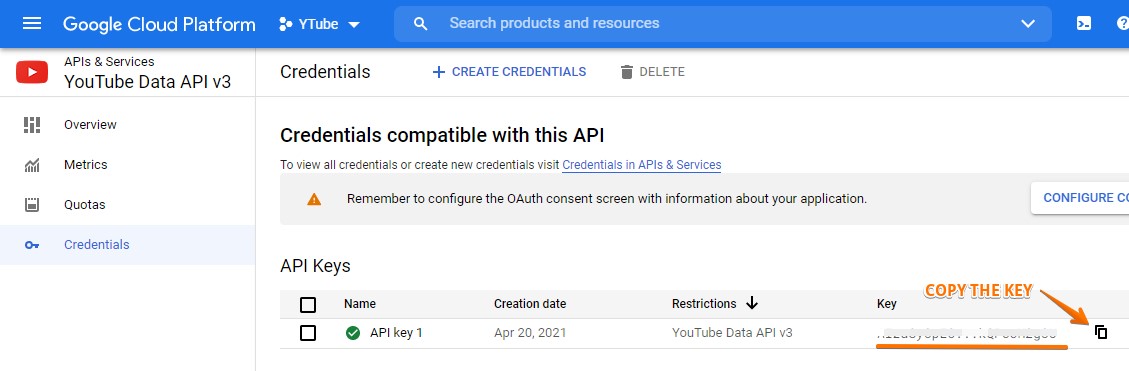
STEP #5: COPY THE KEY
That’s it. Your API Key is ready. Copy and add it to our plugin’s settings page.
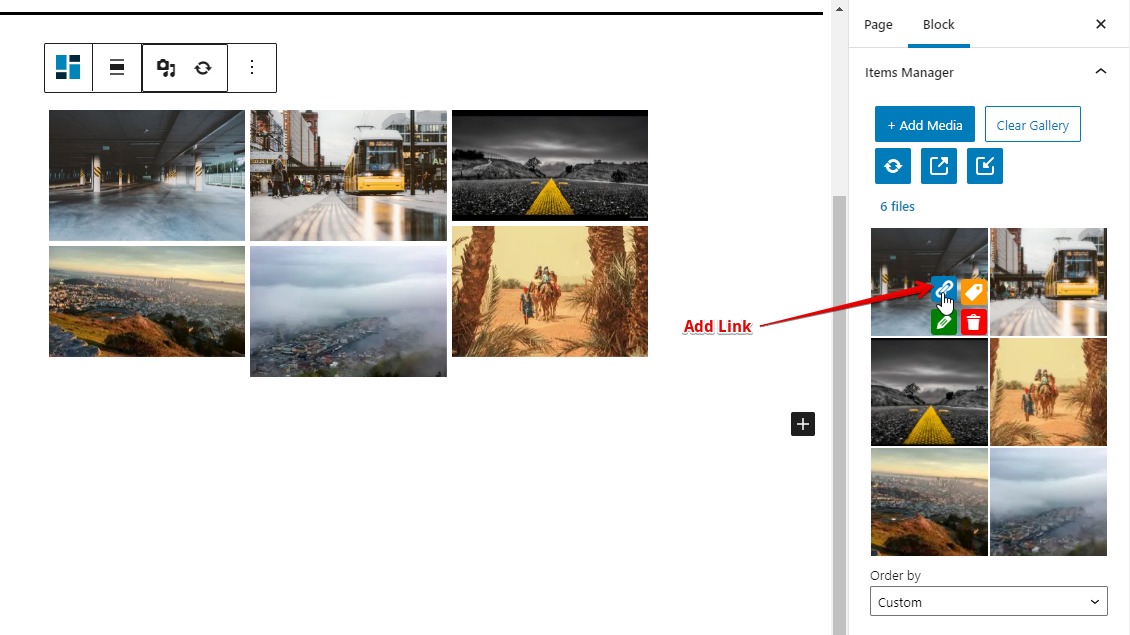
STEP #1: Create galleries and add images to it.
STEP #2: Selecting an image (poster in the future). And click on the Add Link button.
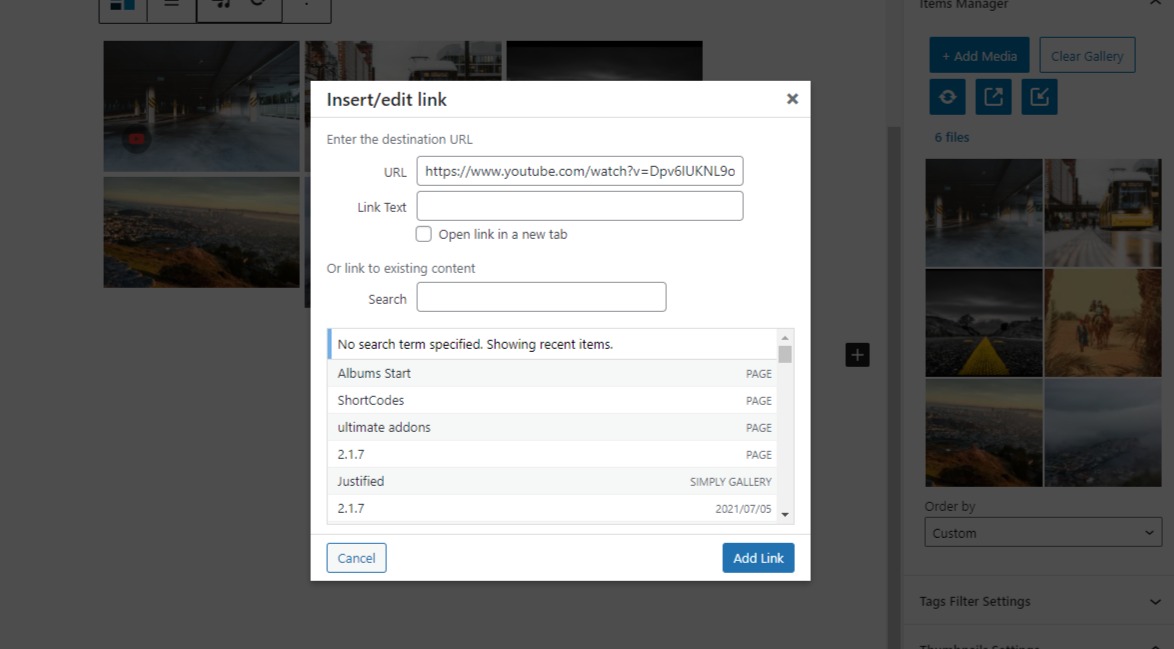
STEP #3: We copy the link for viewing from YouTube or Vimeo and add URL to the field and confirm the action.
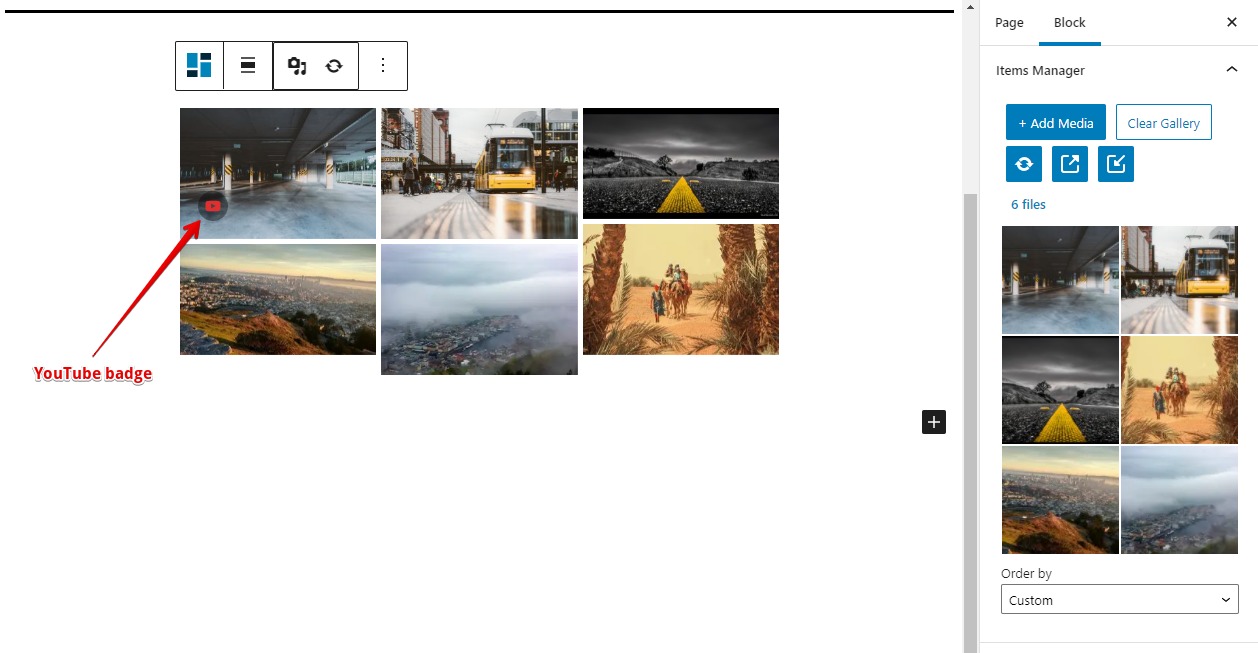
STEP #4: If the link is valid, you will see the badge on the image
Please note that you will need to login on Vimeo, if you don’t have a Vimeo account, you will have to create one.
STEP #1: GO TO VIMEO DEVELOPER PORTAL
Click Vimeo Developers and log in with your Vimeo account.

- Add App Name
- Add Description
- Select the first item – since this is the easiest way
- Сonfirm that you will comply with everything and everywhere
- Create App
STEP #2: CONFIGURING THE APPLICATION
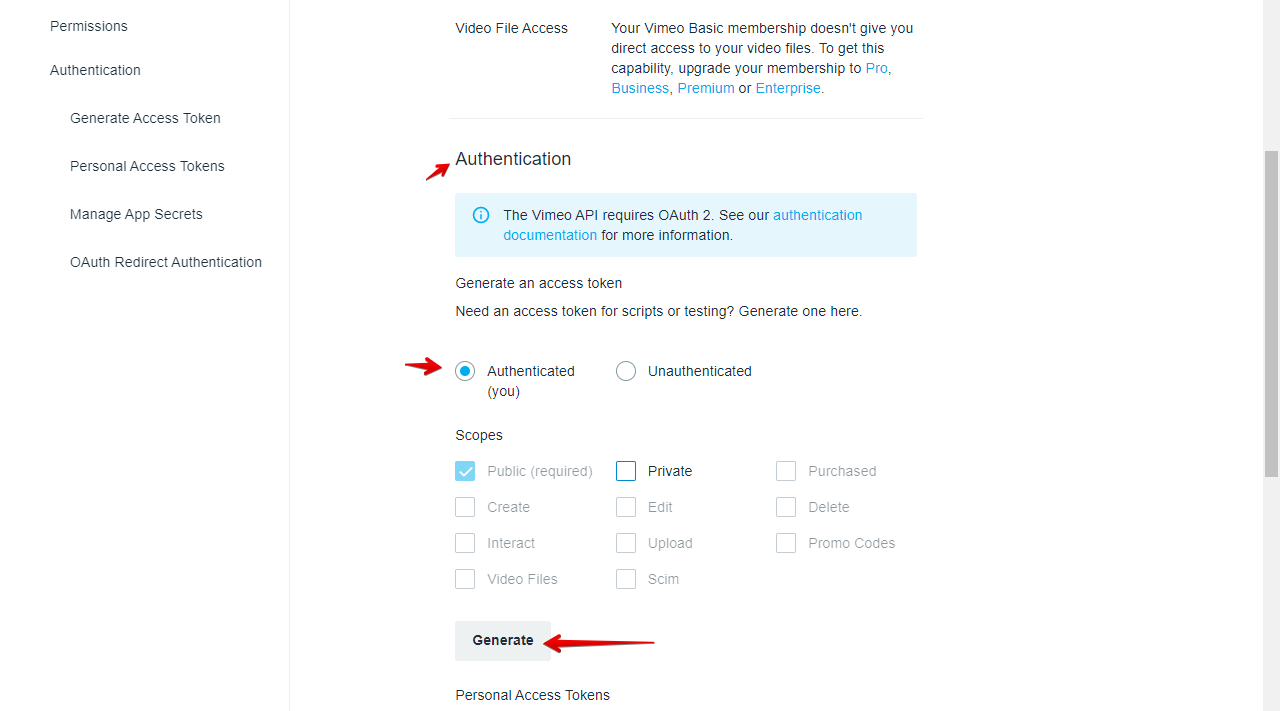
We go to the authentication section. And we create a token for scripts from your WordPress site.
STEP #3: COPY PERSONAL ACCESS TOKEN

As long as this token exists, the plugin will have the right to receive content from Vimeo (Vimeo will identify requests as trusted). When changing the token, you need to update the token in the plugin settings panel SimpLy Gallery -> Premium Settings Page -> Vimeo Personal Access Tokens to restore trust.